I finished laying the flagstone to a few feet from the street pavement. We will finish that area with stained cement to the street so snow plows in the winter will not disturb the pavers. We have gotten many complements from passers-by. Steven finished installing the sheathing on the gable ends.
Sheathing on gable started Driveway finishedWall Sheathing up
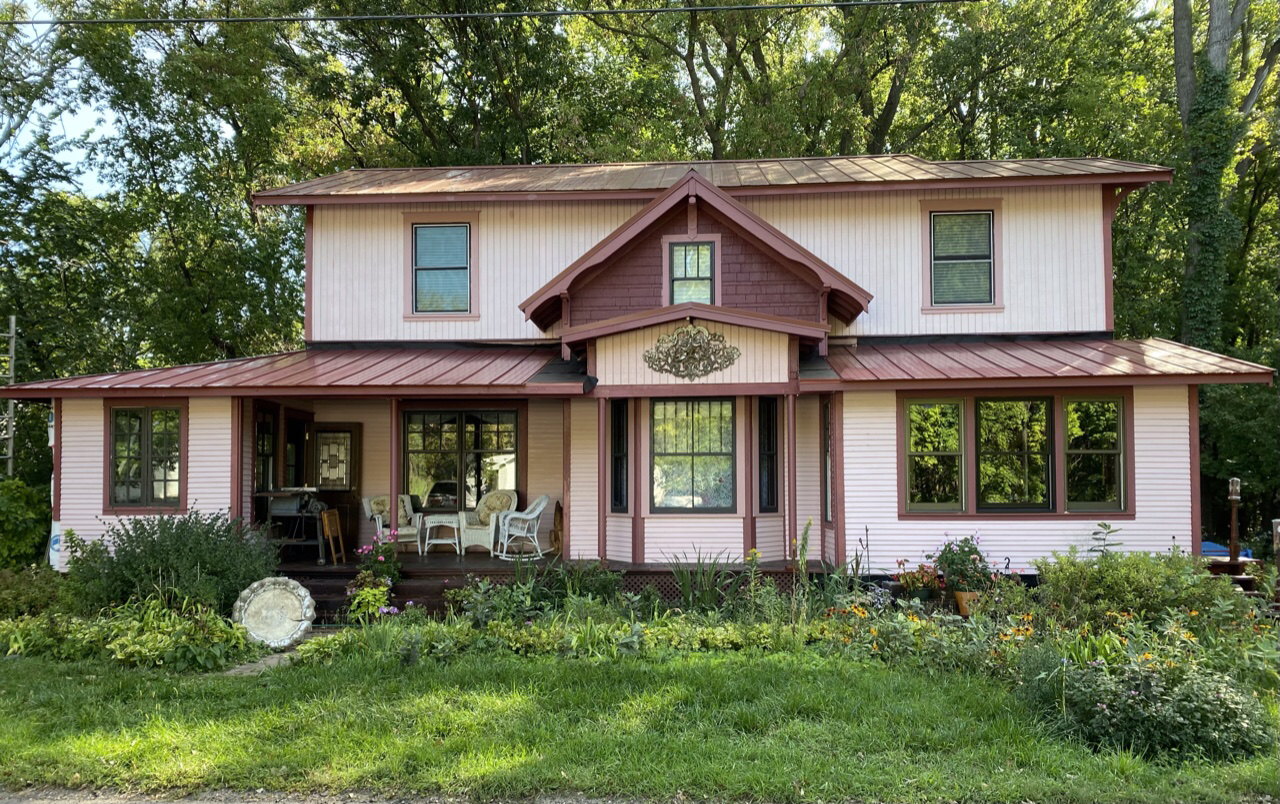
Dirt was removed from the front garden so the flagstone pavers could be continued for the sidewalk. The garden was extended, first by laying layers of newspaper onto of the grass and placing the dirt on top of the newspapers. A brick sidewalk that had previously been laid was removed & the bricks lined the edge of the new garden.
Extended garden
Entrance – brick sidewalk removed – flagstone pavers will be added
Our latest delivery of materials included 3 pallets of flagstone pavers. We are still waiting MNDOT approval for the driveway portion so I am laying the pavers where I can, including extending the sidewalk from the kitchen door to the main door.
Found it!Choosing the best design (of 6)Laying a small section next to the house to edge the gardenAlmost finished here!
Steven put on the rest of the top plates and we started closing in the garage with sheathing. Through trial and error we discovered a way to install the awkward 4 x 8 OSB and installed 8 sheets before we wore out and a light rain began.
Me with the air hammer
Steven put screws in the sheathing to hold it and I used the air hammer to put nails at (mostly) appropriate distances.
The sheathing on the right side of the garage door needed extra nails. I put them 4″ apart. They needed to be 3″ apart, so now they are 2″ apart!
Moral: read the directions first!
Driveway and sidewalk from 642 pavers
All the pavers have been laid from the 4 pallets (642 pavers). I need to measure and decide if we still need the 489 pavers that are scheduled to be delivered with the trusses. We need to extend the driveway (to the left) 15′ to the street. (We are still waiting for MNDOT approval.) I also want to curve the lower section more and I need to add to the area in front of the shed (which will be removed). We also want to extend the sidewalk to the doorway to the left.
It felt great to have the 4th wall (mostly) in place. Because the right side of the 7′ x 10′ doorway is only 2′ wide, we had to very specific detail work. The header has to be 2″ x 12″ and extend to the wall on the right.
Two metal supports to attach to the wall
It also had to have two special metal supports as seen extending from the cement floor. The sheathing (to come) has to have a special close nailing pattern.
We still need to glue 1/2″ spacing to the second 2″ x 12″ header. This will then be glued and nailed to the header that is already in place. It would have been too heavy for us to raise if it had been all put into place right away.
Header extended to the right wallBeginning of driveway
We have chosen to have a driveway made of pavers. We chose Autumn Red to coordinate with the rose palate of the house. We can’t continue the driveway to the street because the street is a Minnesota State highway and we need a permit from MNDOT. We’ve been waiting several weeks. Two pallets of pavers have been installed.
Paver color variation & designPallets of paversViewed from the garage
We’ve received 4 pallets and will have more delivered with the trusses (1180 pavers)
While the cement was being poured and finished and Steven was framing the platform for the door, I primed the back of the house – at least as far as I could reach with my ladder. Not finished but a great improvement! Hope the neighbors are pleased!
Partly painted back (Before)Primed back of houseHalf painted windows (Four years ago)Primed Windows/Primed chimney
One of three large piles of branches left from earlier tree trimming.
Three large piles of branches yielded one large pile of wood chips.
The wood chips were hauled to the back of the house and placed around the hostas and ferns which have taken quite a beating from all the tree trimming.
Third and largest branch pile behind the garageSitting area instead of branch pile behind the garage
We learned that we couldn’t use the siding on the garage that we had planned. It has to match the first floor of the house in design and color, so our vertical siding can’t be used. Back to the drawing board. We either take off all the siding on the first floor and replace it or find 3″ horizontal siding for the garage.
On a trip to our local Menards, we found good quality siding 8″ wide 16′ long. Steven will rip it to 4″. If we overlap it 1″, we will have 3″ horizontal siding we can paint to match the house. A lot of work to rip it but we won’t have to remove the siding on the house and can keep the vintage 1900 look.